In Hollywood, the terminal is often used to signal that something extraordinary is happening - like a spinning double helix on a screen in the background - and that the person at the keyboard is a highly skilled user (aka hacker). In this course, we'll be using the terminal for more practical reasons, but it's undeniably cool. Command line tools allow you not only to run programs, but also to efficiently manage files, automate tasks, and maintain greater control over your system in a repeatable manner - essential in many technical and scientific fields.
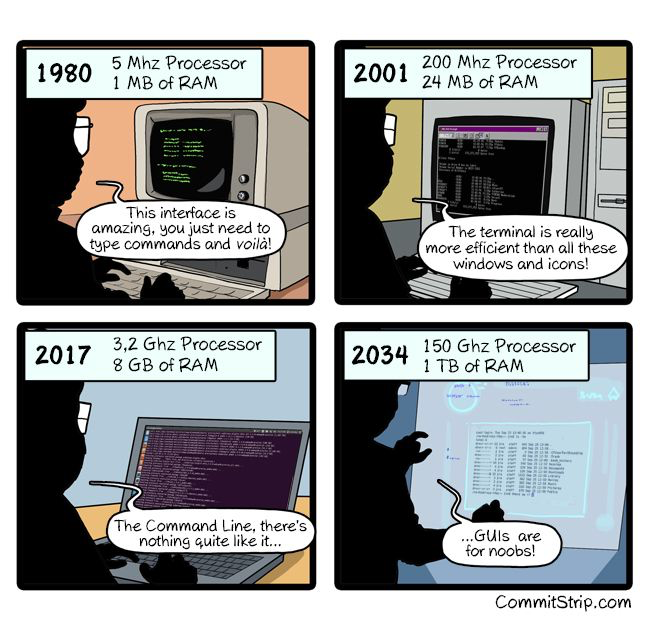
While GUIs (Graphical User Interfaces) are convenient for everyday tasks, the terminal offers biologists the efficiency, automation and precision required for complex data analysis and computational research. It supports reproducibility, provides access to advanced tools and enables the integration of diverse data sets, making it an indispensable capability for modern biological research.
For biologists, mastering the terminal is crucial for the following reasons.
- First, terminal-based tools and scripts efficiently process and analyze large datasets. These include genomic sequences, protein structures, and experimental results. Command-line tools like awk, sed, and grep are essential for handling these datasets. So are many bioinformatics programs from different sources.
- Second, reproducibility is critical in science. Terminal commands and scripts let biologists automate tasks. This ensures easy reproduction and sharing of analyses. This automation includes running bioinformatics pipelines, generating reports, and batch processing experimental data.
- Third, biologists use remote servers and HPC clusters for tasks like genome assembly and protein modeling. These tasks are very compute-intensive. The terminal allows efficient job submission and management. Use command-line tools or job schedulers like SLURM.
- Fourth, terminal-based tools offer greater control and customization for specialized analyses. Biologists can use scripts and command-line options to customize their workflows. This may not be possible with GUI-based apps.
- Fifth, the terminal integrates different data sources and formats. It lets biologists write scripts to combine data from multiple sources. This skill is vital for tasks like merging datasets, changing formats, and running complex queries.
- Sixth, many bioinformatics tools and databases are for terminal use. They have functions not always found in graphical interfaces. These include: sequence alignment tools, variant calling software, and database query tools. They are common in genomics and proteomics.
- Seventh, mastering terminal commands and scripting helps a biologist. It improves their skills in troubleshooting, debugging, and developing custom solutions for their research. It also makes them more adaptable to new tools, methods, and changing research needs.
Linux Terminal
For the Linux exercises, you'll need a terminal. If you're using a Mac or Linux, you'll already have one pre-installed (a local terminal). Windows users will need to take a few extra steps. Although Windows offers Command Prompt and PowerShell, these are limited to Windows-specific commands. Command Prompt is useful for basic file and system management, while PowerShell offers more advanced scripting for automation.
For a full Linux experience on Windows, you can use the Windows Subsystem for Linux (WSL), which lets you run Linux side-by-side with Windows. In Windows 11, WSL is easier to install and even supports graphical applications. Alternatively, you can use a shell client such as SSH to access a remote Linux server. Windows 10 and 11 come with an SSH client by default. Check to see if you have it:
- Open Terminal in Windows:
- Press the [Windows] + [R] keys to open the Run utility.
- Typecmdin the Run window and click OK. This opens Command Prompt or PowerShell. - In the terminal window, type
ssh -helpto verify SSH availability.
For Windows users, I recommend logging into the GDC server and using the remote terminal for the Linux exercises. Mac and Linux users can choose either the local or remote terminal for the first part. For more advanced exercises, the remote terminal may be easier for all users as it has all the necessary applications pre-installed.
Command Line Syntax
The general syntax pattern for a command line is:
# prompt> command [option(s)] (File)
Example: List directory (also know as folder) contents (ls).
ls         # Display the contents of the current directory/folder
ls test/   # Display the contents of the "test" folder
ls -l -h   # List the contents of the current folder with detailed info (option -l) and human-readable file sizes (option -h)
ls -lh     # Same as above, but in a shorter format
Info
Most problems in Linux have multiple solutions. Finding the most efficient way (e.g., using -lh instead of -l -h) is a common practice in Linux, almost an obsession. In the beginning, it's okay to stick with what you know.
Notice that the ls command with the -lh option provides more information than just the directory contents. It shows file and folder permissions, the owner, the size, the last modified date, and of course, the contents themselves.
# - rw- r-- r-- jwalser users 161K Jan 17 12:22 p117_Help.txt
# - rw- r-- r-- jwalser users  92M Jan 17 16:51 p117_Metafile.txt
# d rwx r-x r-x jwalser users  16G Feb 19 15:43 data
# | --- --- ---  |       |     |    |            |
# |  |   |   |   |       |     |    |            └⊳ files / directories
# |  |   |   |   |       |     |    └⊳ date and time
# |  |   |   |   |       |     └⊳ size
# |  |   |   |   |       └⊳ group
# |  |   |   |   └⊳ owner
# |  |   |   └⊳ rights all (read/write/execute)
# |  |   └⊳ rights group (read/write/execute)
# |  └⊳ rights owner (read/write/execute)
# └⊳ d directory (folder) / - file
Permissions are crucial and must be set correctly. If you only have read permissions (r--), you won’t be able to modify a file. For a deeper understanding of file permissions, refer to the Guru99 tutorial. While this is an advanced topic that will be covered later, for now, just remember that the ls command can do more than just display folder contents.
Common Terminal Commands
When working with a Linux terminal, mastering a set of core commands is essential for navigating and managing the system. The commands listed here provide a solid foundation for interacting with files, directories, and processes. These basic commands allow you to navigate the file system, manipulate files, and obtain detailed information about various elements of your working environment.
Although this list is not exhaustive, it includes many of the most commonly used commands to help you get started. With practice, you'll become more familiar with their use, and you can always refer to the manual (man) pages for more detailed information on any command.
pwd.................: absolute path name of the current working direction
man <command>.......: manual page for command (exit with q)
file <file>.........: determine file type
cd <where>..........: change directory/folder
cd .. ..............: go up one directory
cd .................: go home
mkdir <dir>.........: create directory
rmdir <dir>.........: remove directory (if empty)
ls <dir>............: list content of directory
ls -alh <dir>.......: more detail list
echo "message"......: prints content or message
cat <file>..........: print and concatenate files
head -n 5 <file>....: show first n=5 lines
tail -n 5 <file>....: show last n=5 lines
more <file>.........: read file (exit with q)
less <file>.........: similar to more but newer
> & >>..............: re-direct output (e.g. pwd > file.txt)
cp <ori> <copy>.....: copy file
mv <old> <new>......: move and/or rename file
rm <file>...........: remove file/directories - be careful and use option -i in the beginning
wc <file>...........: word, line, character, and byte count
grep "query" <file>.: search file(s) matching query
find................: find files based on characteristics (e.g. name)
sed.................: transform content of text files
clear...............: clear terminal
history.............: show terminal history
date................: display date
cal.................: display calendar
▻ Check out the LinuxCheatSheet for more commands and ideas.
Using Built-In Help
When working in the Linux terminal, it's easy to forget the exact options or syntax for a command. Fortunately, help is always at hand. The Terminal has built-in resources to help you look up information about commands directly from your system, ensuring that it's relevant to your specific environment. This can be more reliable than online searches, which may return information that does not apply to your setup.
The most useful tool is the manual command (man), which provides detailed documentation for almost every command. In addition, there are other utilities such as --help, apropos, and which provide quick overviews or help locate commands and their binaries.
Here are some useful ways to access help in the terminal:
## Access the manual (Syntax: man <command>)
man cat # example

## Available commands (and aliases, functions, builtins and keywords)
compgen -c | less # scroll with [↑] and [↓] and exit with [q]

## Search for commands
apropos list | grep "directory"

## Help (Syntax: help <command>)
help cat # might not work for all commands

## Help
cat --help # might not work for all commands

## Version
cat --version # might not work for all commands

## Where is binary file for the command located?
which cat
Keyboard Shortcuts
Mastering the keyboard shortcuts in the Terminal can significantly speed up your workflow. These shortcuts allow you to navigate and manage the Terminal more efficiently without having to rely on your mouse or repeatedly type commands. Below is a list of useful shortcuts to help you move around, delete lines and control processes directly from the keyboard.
| Key | Action |
|---|---|
| Ctrl+A | Go to the beginning of the line. |
| Ctrl+E | Go to the end of the line. |
| Ctrl+L | Clear the screen. |
| Ctrl+U | Clear the line before the cursor position. |
| Ctrl+K | Clear the line after the cursor. |
| Ctrl+C | Kill the command that is currently running. |
| Ctrl+D | Exit the current shell. |
| Alt+F | Move cursor forward one word (OS X, Esc+F). |
| Alt+B | Move cursor backward one word (OS X, Esc+B). |
System Variables
System variables are predefined variables that store important information about your system environment. By convention, they are written in uppercase letters and serve specific purposes within the shell. Although you can reference and use these variables in your scripts, it's important not to overwrite them, as they are integral to the operation of the system.
echo ${BASH}          # Path to the Bash binary
echo ${BASH_VERSION}  # Current Bash version
echo ${SHELL}         # Current shell
echo ${USER}          # Username of the current user
echo ${HOME}          # Home directory of the user
echo ${RANDOM}        # Generates a random number
echo ${PWD}           # Current working directory
User-Defined Variables
In addition to system variables, you can create your own variables to store values for reuse in your terminal session. These user-defined variables are local, meaning they exist only in the current session and are not permanent. They can simplify your commands and workflows by allowing you to reference stored information, such as directories, filenames, or URLs.
## For all the terminal exercises, I recommend that we create a course-related
## working directory
mkdir -p "${HOME}/EvoGen/BioInf/terminal"

## Navigate to the Working Directory
cd "${HOME}/EvoGen/BioInf/terminal"

## Define Two Variables
MyRegistry="NCC-1701"
MyName="USS_Enterprise"

## Define Resource Location
RSSLocation="https://www.gdc-docs.ethz.ch/GeneticDiversityAnalysis/GDA/"

## Download a Text File
curl -o NCC.txt "${RSSLocation}/images/NCC.txt"

## Print Variables and the Text File Content
clear
echo ""
echo "${MyName} (${MyRegistry})"
cat NCC.txt

# Note: Commands can be "chained" on one line using semicolons (`;`).
#       However, excessive chaining can make commands difficult to read.
Remote Server
Personal laptops have their limitations, especially when it comes to running resource-intensive applications. To overcome these limitations, we use managed servers that offer more processing power, disk space, memory and a wider range of applications. You can access these servers and execute commands using the Secure Shell (SSH) protocol.
For this course, I will provide you with access to the GDC teaching server. This server is a virtual machine (VM), which means it operates as a software-based version of a physical server. A single physical server can run multiple virtual servers, each with its own operating system and resources.
Virtual servers are flexible, scalable and efficient because they share the underlying hardware. However, physical servers - dedicated machines with their own resources - offer higher performance and reliability, but are generally more expensive and less customisable.
Guest Rules
Server rules for guests outline the proper use of a server, covering acceptable activities, access limits, and behavior standards. These rules are essential for several reasons. First, they help prevent unauthorized access and misuse. Second, they ensure efficient resource management, keeping the system running smoothly. Third, they protect data and privacy. Finally, they help create a safe, respectful environment for everyone. Adhering to these rules helps avoid issues like disruptions and data breaches, which in turn keeps the server and network healthy.
For the remote terminal tutorial, you will be a guest on the GDC VM server. Please follow these simple rules:
GDC VM SERVER RULES
☞ Do not share your login details with anyone.
☞ Use only the guest account that has been assigned to you.
☞ Do not use your account for anything other than course-related assignments.
☞ Do not store any important or confidential data on the server.
☞ If you encounter any problems or need assistance, please ask for help.
Note: Your student account will expire two weeks after the end of the course and all data deleted.
Access Remote (VM) Server
# Login to GDC VM server at ETH using ssh:
ssh -X guest??@gdc-vserver.ethz.ch # replace ?? with your guest number
After you run the ssh command, the server will ask you for a password. For security reasons, you will not see what you type. You can copy and paste your password to avoid typos.
Exit Remote (VM) Server
When you are done, use exit to disconnect from the server. Closing the terminal would also work but please don't. Using the exit command to close a connection to a remote server is critical to ensuring a clean and proper termination of your session. It allows for the graceful shutdown of your shell, freeing up all resources and preventing orphaned or zombie processes from consuming server resources. Unlike simply closing the terminal window, which can leave background processes running or cause network problems, Exit ensures that all processes are properly terminated and the server connection is properly closed. This practice also supports accurate logging and enhances security by minimizing the risk of unauthorized access. Overall, using exit is essential to maintaining system integrity and respecting shared server resources.
Exploring a Remote Server: Beginner’s Guide
When you first log in to a remote server, there are a few basic tasks that help you get familiar with the system and navigate it effectively. Here’s a quick guide:
- Logging into the Server
Use SSH: To connect to a server, you usually use the
sshcommand. Example:ssh username@server_ip_or_hostname - Navigating the File System
Move between directories: Use cd to change directories.
Example:
cd /hometakes you to the home directory. List files: Uselsto see files and folders in your current location. Example:ls -llists files with details like permissions and ownership. - Check Who You Are
Who am I?: Run
whoamito see your current username. Groups: Rungroupsto check which groups you belong to, which affects what files you can access. - System Information
OS and kernel: Use
uname -ato get details about the server’s operating system and kernel version. Memory and disk usage:free -hshows how much memory is being used.df -hshows disk space availability. - Check Running Processes
System load: Use
toporhtopto see which programs are running and how much CPU/memory they use. - Viewing Permissions
Permissions: Every file has permissions that control who can read, write, or execute it. Use
ls -lto view permissions. Modify permissions: Use chmod to change file permissions if needed. Example:chmod 755 file.txtgives the owner full control and others read/execute access. - Useful Commands
Copy files:
cpsource destination Move files:mvsource destination Remove files:rm filenameBy using these basic commands, you can explore the server, navigate directories, and understand more about how the system is set up.
Additional Commands and Concepts for Exploring a Remote Server
Along with the basics, here are a few more useful tools that will help you navigate and customize your experience on the server.
- Finding Programs and File
whereis: This command helps you locate the binary, source, and manual pages for a program. Example: whereis ls will show you where the ls command is located on the system. - Using Aliases
alias: Aliases allow you to create shortcuts for commonly used commands. This can save time and make your workflow more efficient. Example:alias ll='ls -l'will let you typellinstead ofls -lto list files with details. - Environment Variables
$HOME: This variable stores the path to your home directory. Instead of typing the full path, you can use$HOME. Example:cd $HOMEtakes you to your home directory. Other Variables: There are many useful environment variables, such as:$PATH: Defines where the system looks for executable files.$USER: Holds your username. You can view all environment variables using the commandprintenv. - Setting Variables
You can set your own variables to store data or paths: Example:MY_VAR="Hello World"sets a variable, and you can reference it later with $MY_VAR`.
Self-Study Links
Here is a collection of perhaps helpful links.